Cloud City
Step 8 ¢ The Clouds
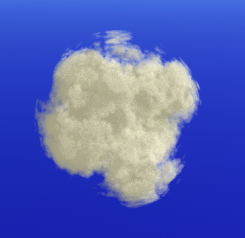
For the final scene, we will be creating volumetric clouds for our city to sit
amongst. These will really give an extra dimension to the scene as opposed to
just a flat sky. When creating volumetric clouds, it is important to follow a
couple of rules. The first is simple enough: the material you choose from the
volumetric material menu should be applied to a sphere and the sphere should
keep its default shape. The scale can be changed so the proportions are equal,
but the sphere should not be stretched or squashed. Secondly once you start
duplicating the spheres try not to let them overlap or touch each other as this
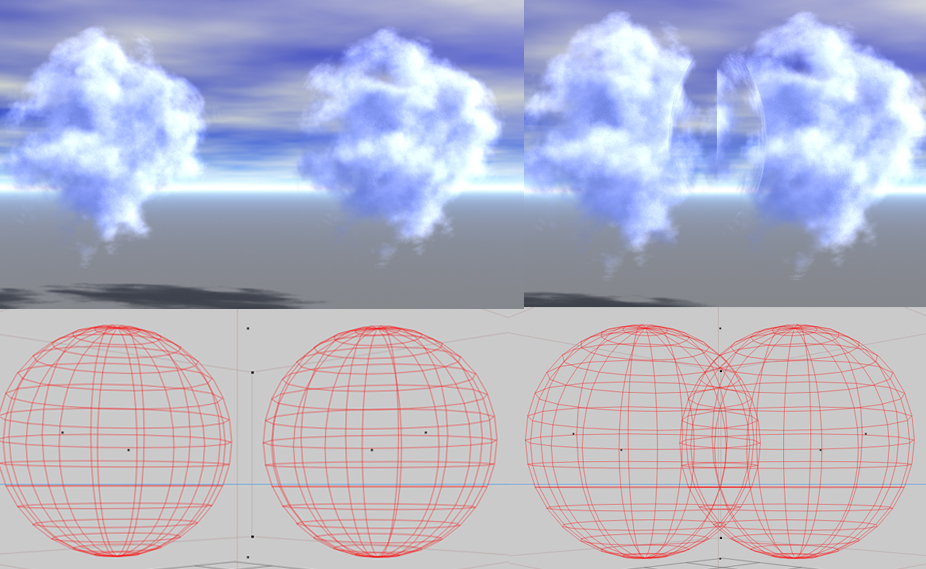
will affect the outcome of the material. In the example below, we have two renders.
The
first shows two spheres with a cloud material applied.
Neither are touching nor overlapping so the material looks fine. In the other
example the spheres overlap and this causes the material to show the edge of the
spheres shape within. So for this reason, keep them apart.
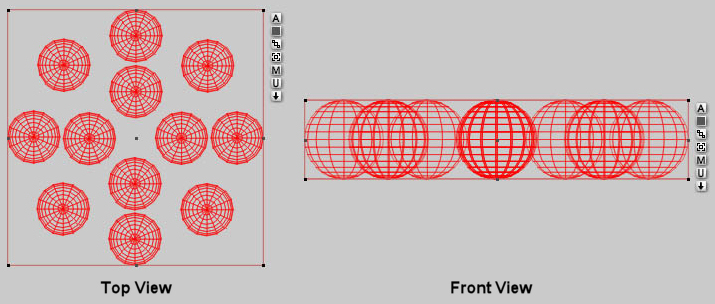
(click on image for a larger view) Creating the clouds for the scene will involve a number of spheres. They will be
arranged in a symmetrical pattern for the foreground clouds, whilst a few larger
clouds will be placed in the distance. The clouds will be arranged around the
camera 360 degrees towards the horizon so when the camera rotates a different
view can be achieved. Create a sphere and enter the Materials Library. Choose
"Soft Cumulus" from the Masters Series Cloud City sub-library. This is the same
"Soft Cumulus" material available from the Volume library but with some
additional changes made to it to change the ambient color and a few other
options.
 Step 4. Duplicate the spheres to make this shape and group them all together
(Ctrl G). Enter the attributes menu and name the group as "Clouds 1". The
perspective camera will sit in the centre of this when we set up the final
scene. DonÆt worry to much about aligning them exactly, because in the real
world clouds will not appear symmetrical
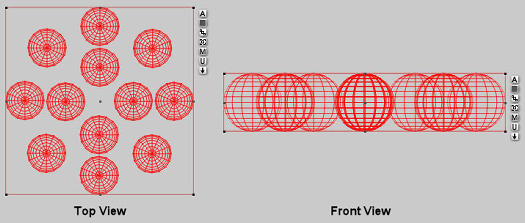
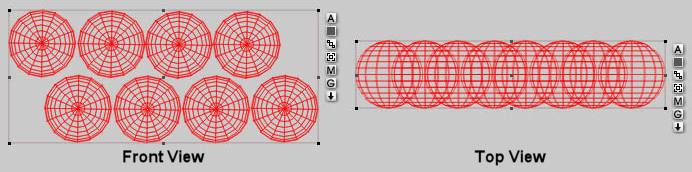
(click on the image for a larger view) Create another sphere and apply the same volumetric material. Then set
up the spheres to create two rows like so.

(click on the image for a larger view) Before grouping this set of spheres together, select each one
individually and slightly change the settings. You can rotate the spheres, move
them up or down, or enter the Materials Lab and change the base density of the
material. This is to give them a random appearance, to make the scene more
realistic.
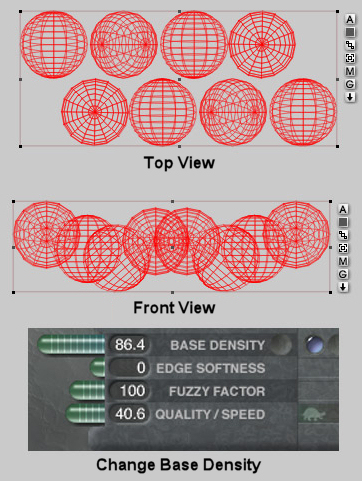 Once you are happy, group the spheres together. Duplicate the group (Ctrl-G) so you have
eight of these cloud groups altogether and arrange them in an octagonal shape.
Use the Rotate tool to get them at the right angle to fit. Group all of these together and give the group a name ōClouds 2ö for example.
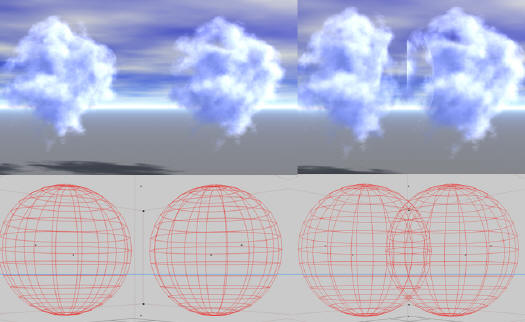
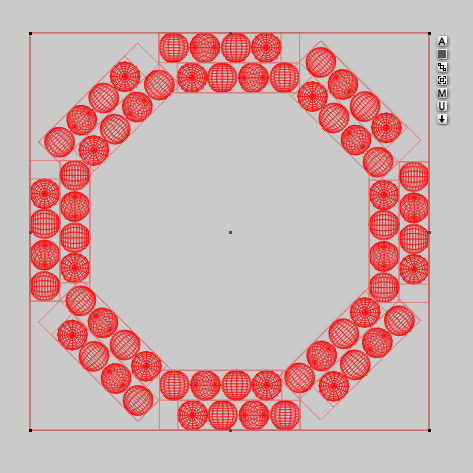 Select both cloud groups and using the align tool from the edit palette
to center them together. Group the clouds and name the group.

Save the Bryce file as "Clouds" for later use.
Step 9 The Sky |