Cloud City
Step 6 ¢ Building the City
With all the individual models created it is time to put them to use. So the
next stage will be assembling all the pieces together to create the final model
for use in your scene.

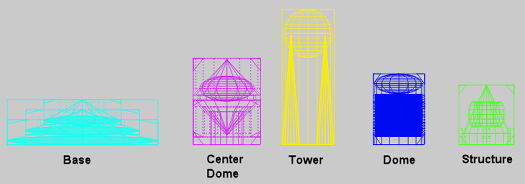
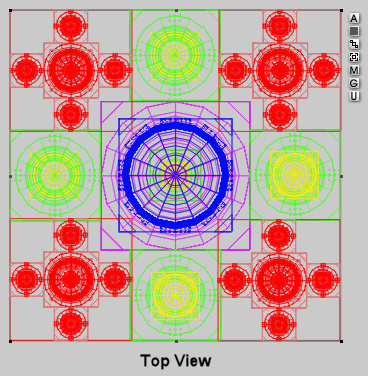
(click on image for a larger view) The city consists of five main
components, which will be duplicated and arranged accordingly. This stage of the
process will involve alignment and grouping for ease of use. They will also be color
coded using the family feature.
(click on image for a larger view)
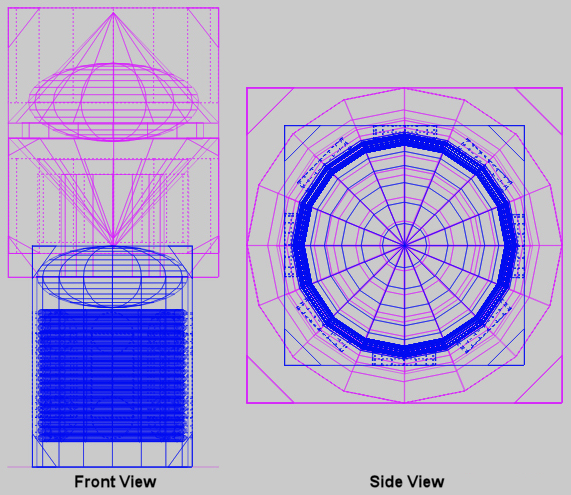
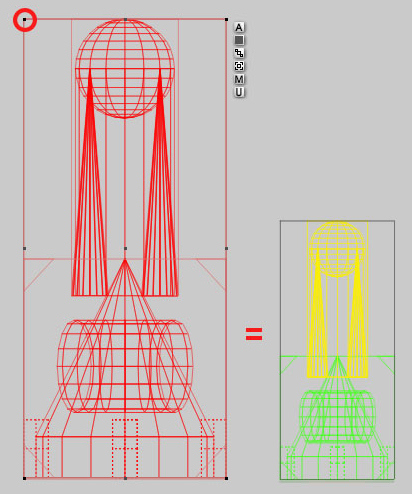
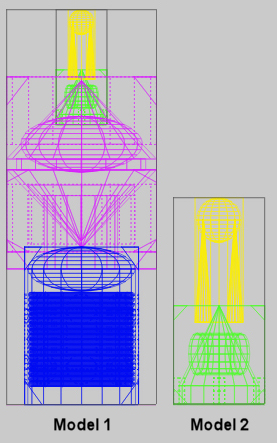
First, load a Center Dome and change the family color to purple then
a Dome model and change the family color to blue. Next, place the Center Dome
above the Dome and align it as shown below (place the point of the lower cone on
the top of the sphere) and group the two together (Ctrl-G). These will become the centerpiece to
creating the city. Name the group something like "Dome Group 1".

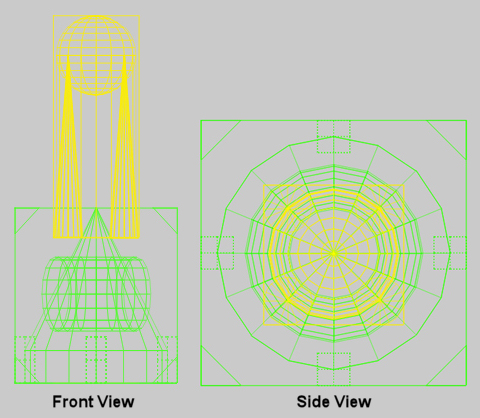
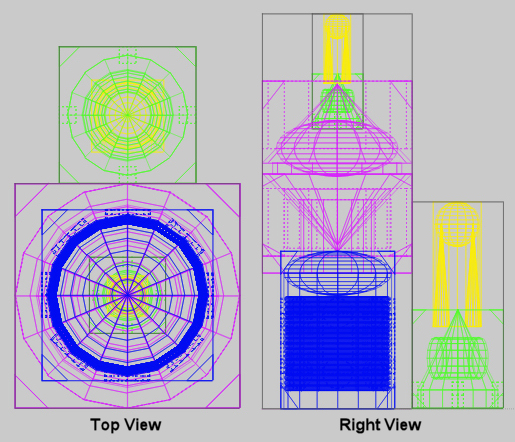
(click on image for a larger view) Now, load a Tower model and change the
family color to yellow then load Structure model and change the family color to
green. Next, take the tower model and align it with the structure model as shown
below (reduce the size of the tower if needed to get a similar scale to the
structure) and
group the two together (Ctrl-G). Name the group something like "Main Tower 1" or
"Tower Group 1".
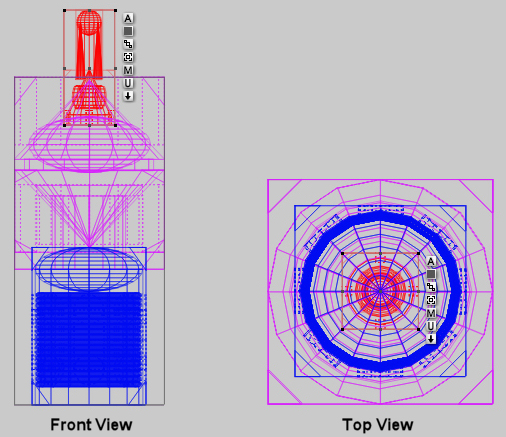
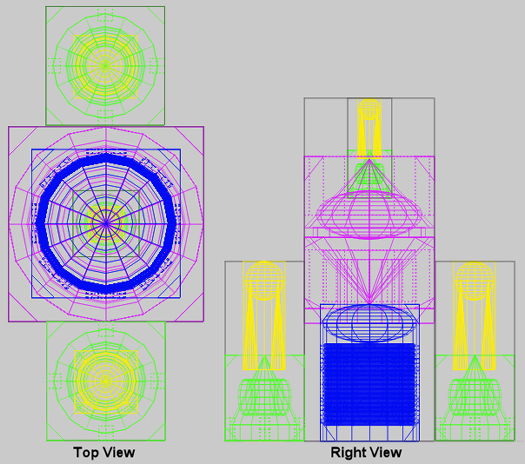
 Duplicate the tower group created
above (Ctrl-D) and reduce the scale similar to the example below (it doesn't
have to be exact, just get close and you can modify it later if needed):
 With the scale reduced on the duplicate,
place it above the Dome Group, and place the bottom of the tower just inside the
sphere of the dome then group them all together (Ctrl-G). Name the group
something like "Main Dome 1".
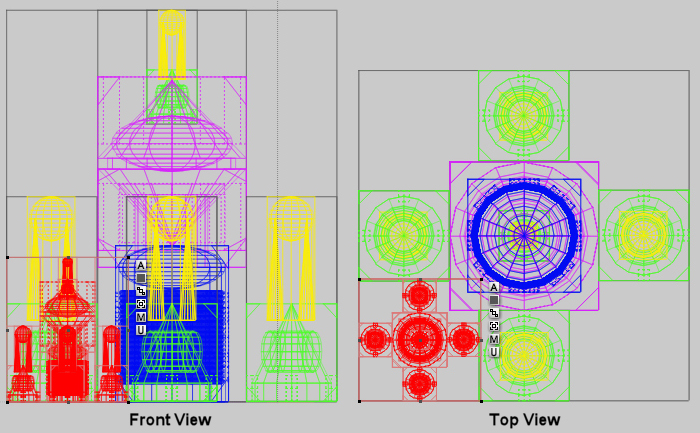
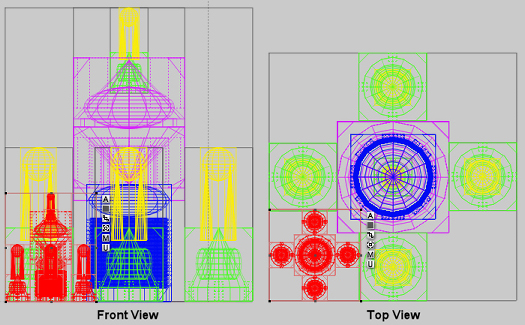
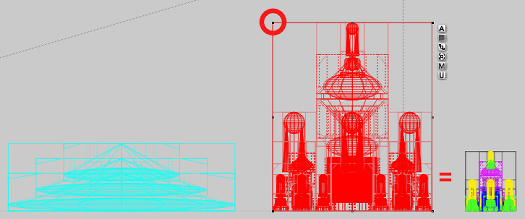
 You should now have two models made up of all the parts created originally. The
next stage will be to duplicate model 2 and arrange them around model 1.
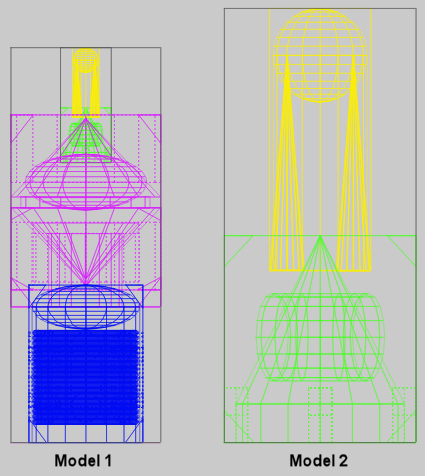 As model 1 will be the tallest building in the city you need to reduce
the scale of model 2 as shown below:
 Align model 2 with model 1 so that model 2 is at the 12 oÆclock position.
 Duplicate model 2 (Ctrl-D) and move it into the 6 oÆclock position
(change the Z-origin to negative):
 Select both versions of
model 2 and duplicate them (Ctrl-D) so you now
have four in total. Group the two duplicates together (Ctrl-G) and enter the
attributes menu by clicking the  button by the bounding box. Enter 90 in the Y-rotate field and click on the
checkmark to accept the changes. Ungroup the two duplicates
(Ctrl-U). You should now have model 2 and the duplicates you made arranged
around model 1.
Select all the models and group together as one. Name it something like
"Building Group 1".
button by the bounding box. Enter 90 in the Y-rotate field and click on the
checkmark to accept the changes. Ungroup the two duplicates
(Ctrl-U). You should now have model 2 and the duplicates you made arranged
around model 1.
Select all the models and group together as one. Name it something like
"Building Group 1".
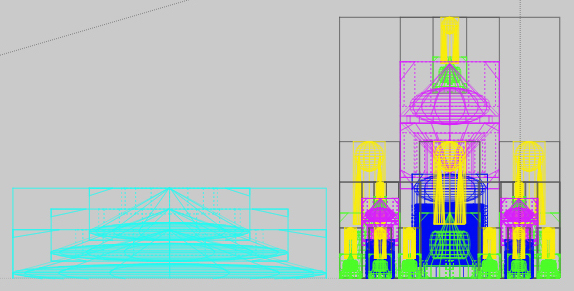
 With the group selected duplicate it (Ctrl-D)
and reduce the scale to around a quarter of the size and align it in one corner
of the larger group as shown below. Notice how the edges of the small group
slightly overlap the edges of the larger towers.
(click on image for a larger view) Duplicate the small building group (Ctrl-D)
and change both X and X-origins to positive. Select both small building groups,
duplicate them (Ctrl-D), then group them. Access the Object Attributes by
clicking on the button next to the
bounding box, enter 90 in the Y-rotate field, and click on the checkmark to
accept the changes. Ungroup the duplicates by clicking on the
 button once, then select all objects and group them together. This will
complete the buildings for the city. Name the group "City 1". button once, then select all objects and group them together. This will
complete the buildings for the city. Name the group "City 1".
 Load the city base from
your Objects Library and change the family color to light blue.

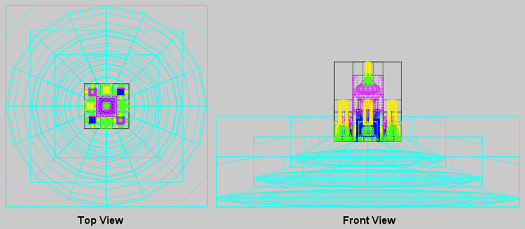
(click on image for a larger view) The city needs to sit on top of the base,
so reduce the scale of the city
similar to the example below so that the top of the city comes about halfway
between the top two cones on the base:
(click on image for a larger view) Move the city above the base and align it with the base
as shown below, lining up the bottom of the city with the top of the second
cutoff box, then group them together (Ctrl G). Enter
the attributes menu and give it a name such as ōCloud City 1ö. Save the city as
a Bryce file with the same name, ready for later use.
(click on image for a larger view)
Step 7 Building the Floating Gardens |