Cloud City
Step 4 ¢ The Dome
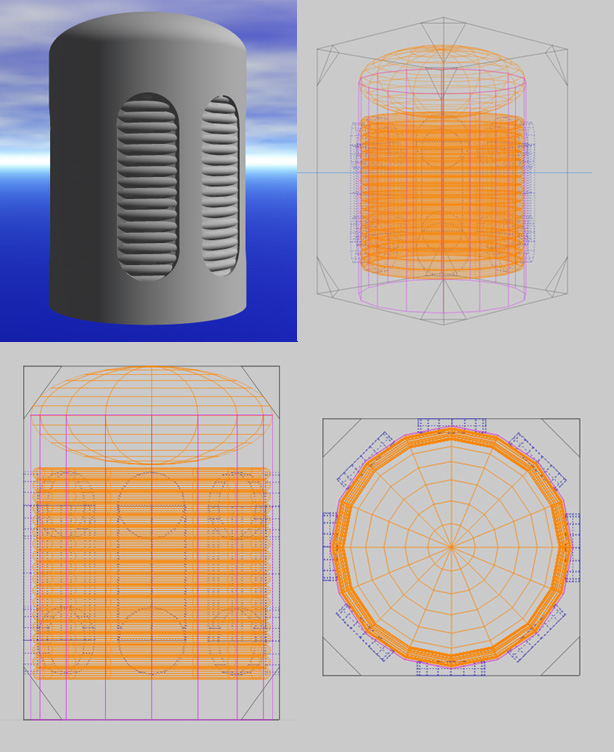
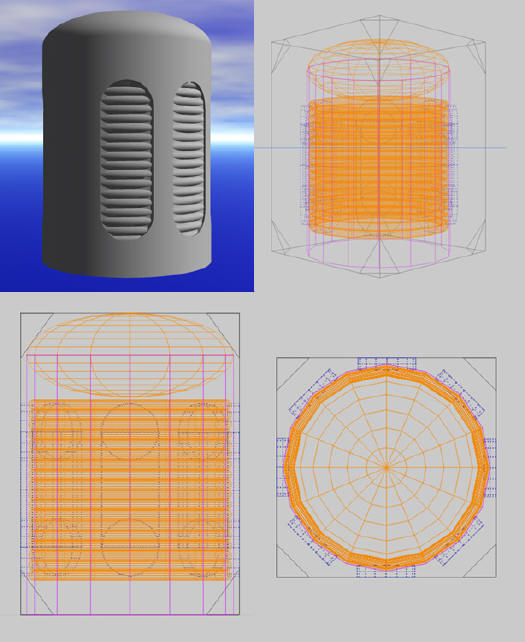
The next model created will be another dome shaped building. The model consists
of 17 cylinders, one sphere, eight cubes, and 18 tori. Aligning
objects and grouping as well as boolean operations are once again used and can be seen in
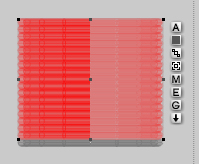
the diagram. The neutral objects appear as orange, the positive objects as pink,
and the negative ones as blue.
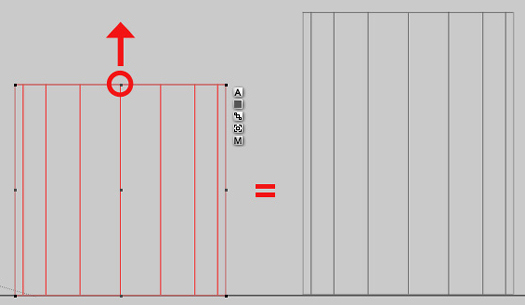
(click on image for a larger version) Create a cylinder and increase the height by a third of its original size
through the Y-axis (one-third of 20.48 is 6.83, so 20.48+6.83 is 27.31 Y-size).
Set the cylinder to Positive and rename it at the same time. If you entered the Y-size of the cylinder
through the Object Attributes, you'll need to move the cylinder so it is resting
on the ground. Make sure the Edit palette is active and choose Snap to Ground
from the Align menu.
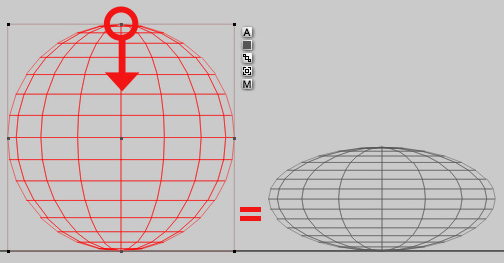
 Create a sphere and squash it down
through the Y-axis:.
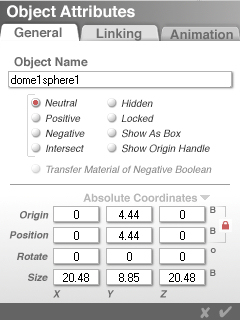 Align the two objects to create a ōdome structureö
by moving the squashed sphere to the top of the cylinder. The center of the
sphere should line up with the top of the cylinder. Since the cylinder is 27.31
units high, the sphere Y-origin should be 27.31 to match. Select the cylinder
and sphere and
group them together. Move them out of camera view so you can move on to the
next step without them interfering with the workspace.
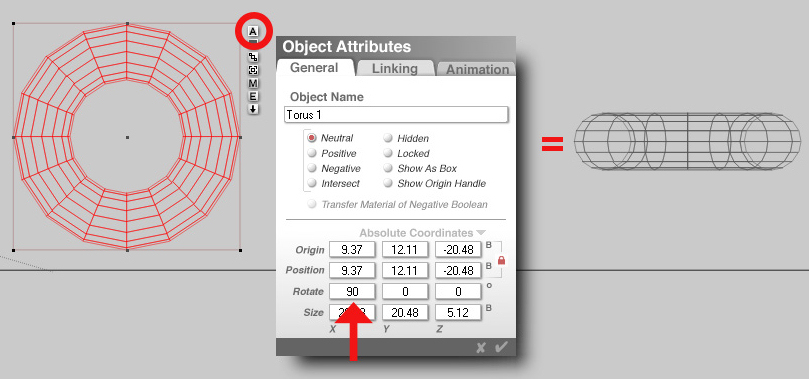
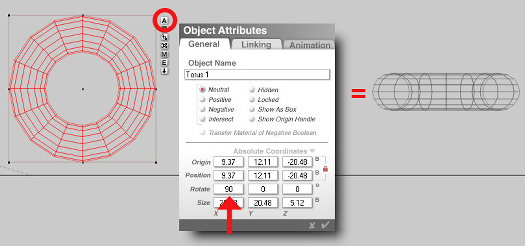
 Create a torus and click on
the  button to access the Object
Attributes. In the Rotate category enter the value of 90 in the ōXö column and
click on the checkmark to accept the changes. button to access the Object
Attributes. In the Rotate category enter the value of 90 in the ōXö column and
click on the checkmark to accept the changes.
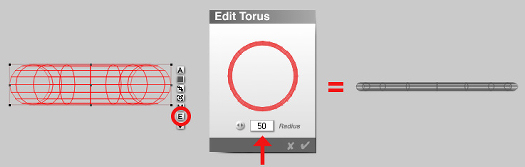
(click on image for a larger view) Click the
 button to edit the thickness of the torus
and enter the value of 50 in the radius box and click on the checkmark to accept
the changes. button to edit the thickness of the torus
and enter the value of 50 in the radius box and click on the checkmark to accept
the changes.
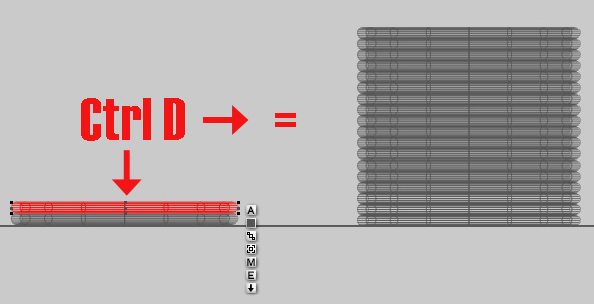
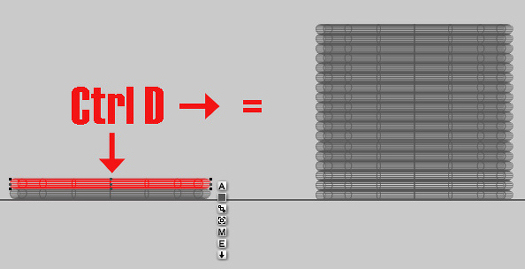
(click on image for a larger view) The next step can be done in one of two
ways, by duplication or mult-replication. Duplication: Duplicate the torus and sit the new one on top of the original.
Repeat
this process until you have 18 altogether, then group them together and reduce
the scale very slightly. This is so when the whole model is complete they will
sit inside the dome structure.
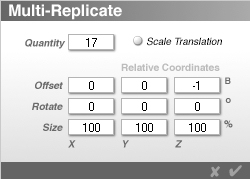
(click on image for a larger view) Multi-replication: Select the first torus
and click on the button to access
the Object Attributes. Note down the Z-axis size of the torus, which is 1. Close
the Object Attributes and choose Edit : Multi-Replicate from the menu. Since you
want 18 total tori when done, enter 17 in the Quantity field. Enter -1 in the
Z-offset field as we want the duplicates to go above the original torus and
offset them by the height of the original torus. Click on the checkmark to
accept the changes.
 You'll get the same
result as duplicating but with less work. Select all the tori, group them together, and name
the group. Reduce the size slightly so that it will fit inside the dome
structure.
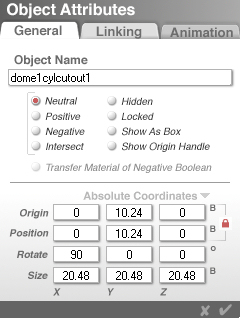
 Next we will make a simple ōwindowö that will cut into the side of the
positive cylinder of the dome. Create a cylinder. Enter the attributes for the
cylinder and rotate it 90 degrees through the X-axis.
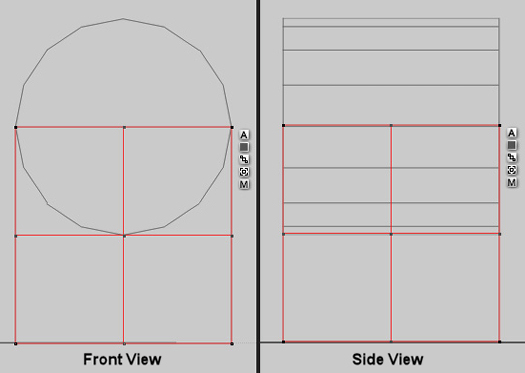
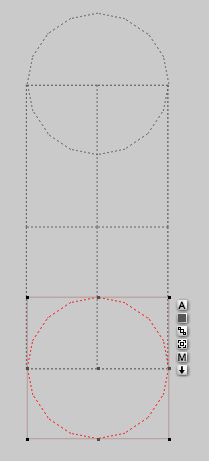
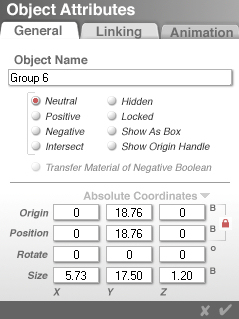
 Next, create a cube
and align it with the cylinder like so (the cube is 20.48 units high, so move
the cylinder up on the Y-axis to 20.48 units):
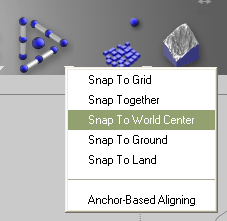
 Select the cube and
increase the height through the bottom Y-axis so that the height is about double
(approximately 41 units). If you resize the cube through the Object Attributes,
you'll need to drop the cube down to re-line it up with the cylinder. Select the
cylinder then make sure the Edit menu is active and select "Snap To World
Center" from the Align menu.
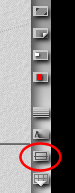
If you don't see the part of the cube that is now under the ground plane, you
can either delete the ground plane or turn off the Wireframe Underground. To do
this, click on the Wireframe Underground On/Off button in the right-hand menu:
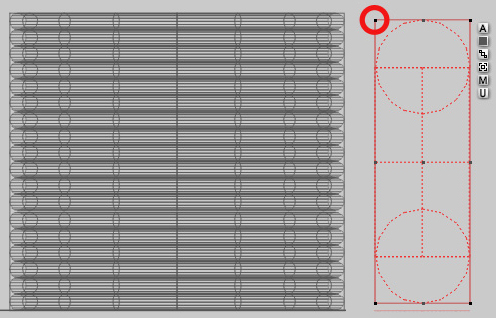
 Select the cylinder and duplicate it by pressing Ctrl-D on the
keyboard, then align it so it sits symmetrical to the other at the bottom of the
cube (set the Y-origin to -20.48). Select all three objects and press "N" to set
them to negative, then group them together (don't worry about naming the group
as we'll be ungrouping them later. These will be used to cut into the side of
the positive cylinder used in the dome structure from above.
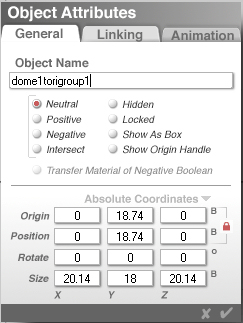
 With the objects grouped resize the scale so it is roughly the same
height as the group of tori created above.
 Adjust the depth of the
group through the z-axis and the ōwindowö is complete:
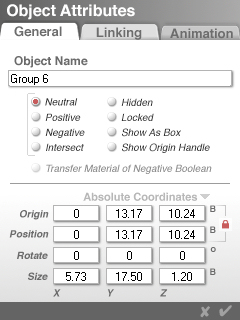
 The final size of the
window should be close to the following:
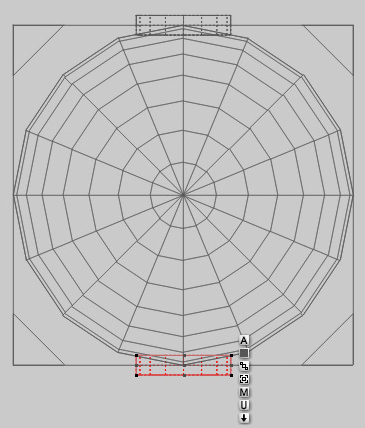
 Switch the camera view to top and reintroduce the dome structure
into the center of the workspace (select it and change the X and Z-origins to
0). You might want to move the tori group out of the way as well. Align the
window at the edge of the structure at the 12 oÆclock position. From the front
the window should also be center to the cylinder as in the
example.

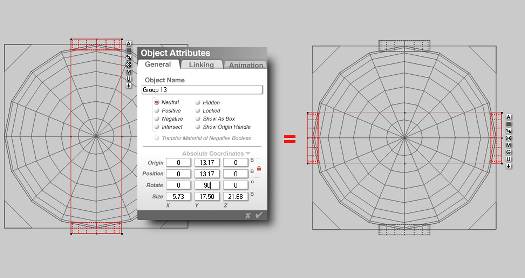
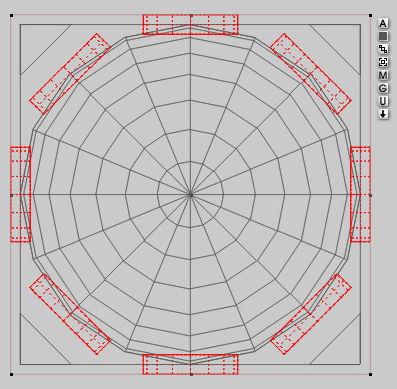
 Using the top view duplicate the window by pressing Ctrl-D
on the keyboard and align the duplicate at the 6 oÆclock position (change the
Z-origin to -10.24).
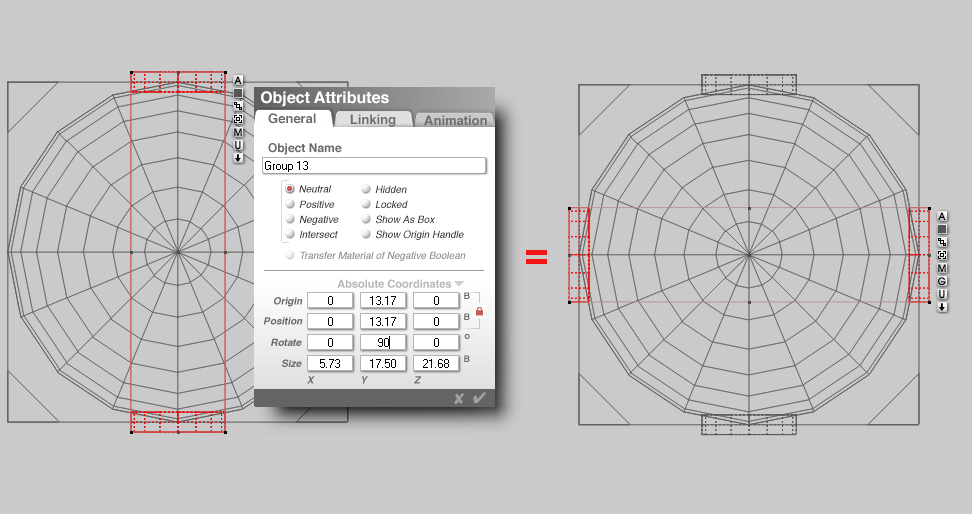
 Select both windows and press Ctrl-D to duplicate
them so you have four
windows. With the two new ones selected group them together and enter the
Object Attributes by clicking the
button next to the bounding box. In the rotate row,
enter the value of 90 in the Y column and click on the checkmark to accept the
changes. You should now have these at the
3 and 9 oÆclock positions. With these two windows selected press Ctrl-U one time
to ungroup.
 Following the process
above, select and duplicate all four windows, group them, and access the Object
Attributes. This time, enter 45 in the Y-rotate field and click on the checkmark
to accept the changes. You should now have eight windows in total, all
symmetrically placed around the edge of the dome structure.
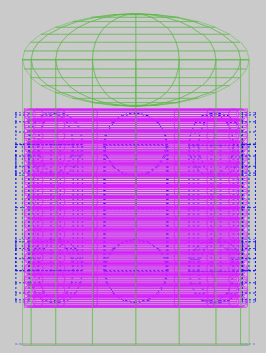
 Select the group of tori that was created
earlier and place them inside of
the dome structure, making sure the alignment along the y-axis matches that of
the windows. In the example, for viewing purposes we can see the dome structure
as green, the windows as blue, and the tori as purple.
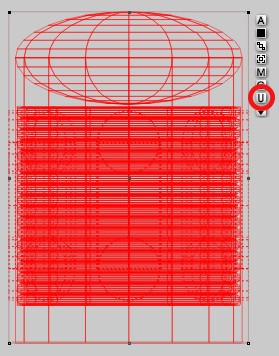
 Select all objects and click the
 button by the bounding box until it
disappears, then click the button by the bounding box until it
disappears, then click the  button to group all objects together to complete the
model. button to group all objects together to complete the
model.
 Do a test render and you
should have something looking like this:
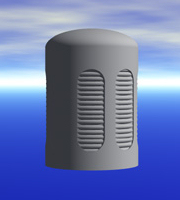 Apply the Polished Pewter
material from the Master Series Cloud City Material Presets sub-library. Save the model to your
Object Presets Library for later use. If you copied the included Presets folder
into the Bryce 5 main folder, select the Master Series library and save the dome to the Cloud City sub-library. Name it
something like "dome" or "Dome 1".
Step 5 The Structure |