Cloud City
Step 3 ¢ The Tower
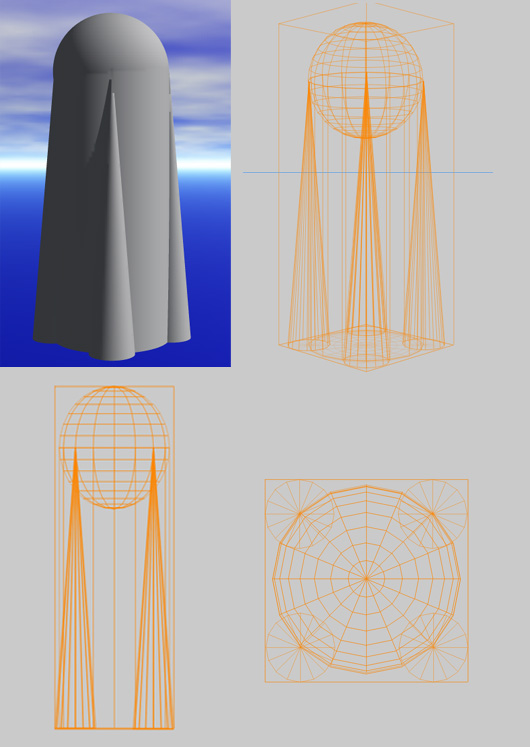
The next model to create will be a simple tower. It consists of one sphere,
one
cylinder, and four cones. This step will involve basic alignment and grouping without any
Boolean operations.
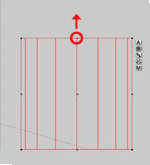
 Select the Front camera mode
and create a cylinder. Stretch it
through the Y-axis to increase the height to about double.
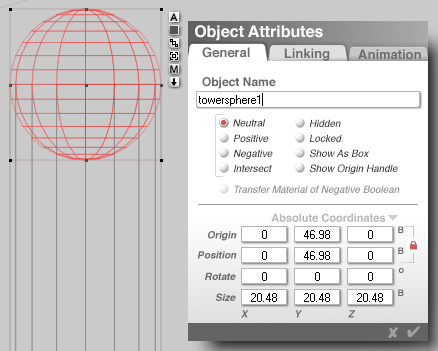
 Next, create a sphere to act as a dome.
Move it into position so the center of the dome is aligned to the top of the
cylinder as in the example:
 Now, create a cone and
reduce the scale to a similar size as you see in the example below:
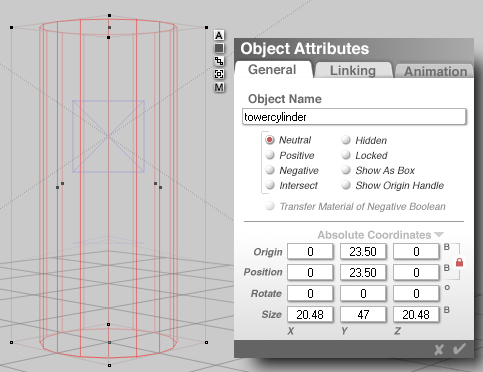
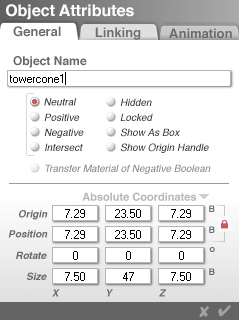
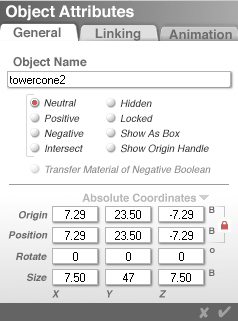
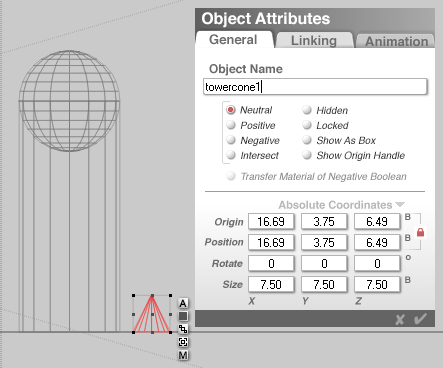 The cone needs to be the same height as the cylinder, so increase
the height through the Y-axis to match the cylinder. To do this select the
cylinder and enter the attributes box by clicking on the
 button. In the size section note
the Y-axis value (47 in our case) and exit the Object Attributes for the
cylinder. Next, select the cone, enter the Object Attributes, and change the
value of the Y-size to match that of the
cylinder (i.e., 47). button. In the size section note
the Y-axis value (47 in our case) and exit the Object Attributes for the
cylinder. Next, select the cone, enter the Object Attributes, and change the
value of the Y-size to match that of the
cylinder (i.e., 47).
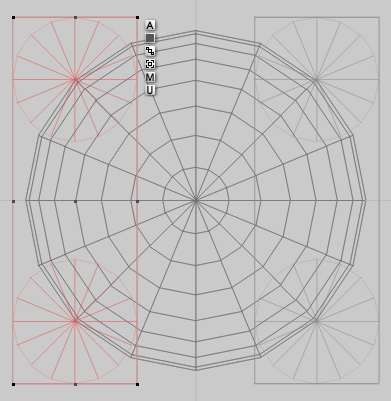
 Switch the camera view
to top view and move the cone into position as in the example:
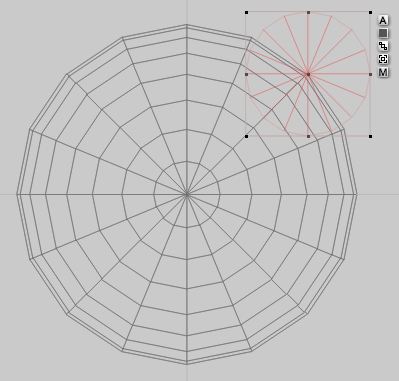
 Duplicate the cone (Ctrl-D)
and place symmetrically to the original by changing the Z-origin to -7.29:
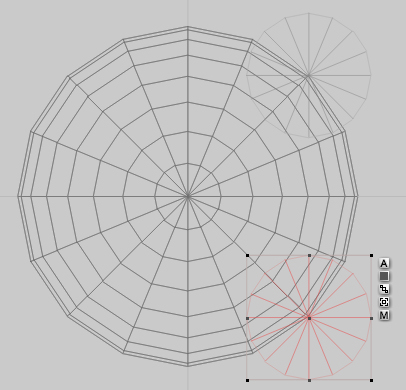
 Select both cones,
group them, then duplicate them (Ctrl-D), click on the
button and change the X-origin to
-7.29. This will move them to the opposite side of the sphere.
 Select all objects and click the
on the  button to ungroup the cones,
then on the button to ungroup the cones,
then on the  button to group the four
cones, cylinder, and sphere. button to group the four
cones, cylinder, and sphere. Apply the Polished Pewter material from the
Master Series Cloud City Material Presets sub-library. Save the model to your Object Presets Library for later use. If you copied
the included Presets folder into the Bryce 5 main folder, select the Master
Series library and save the tower to the Cloud City sub-library. Name it
something like "tower" or "Tower 1".
Step 4 The Dome |