Cloud City
Step 1 ¢ City Base
We'll start off by constructing a series of models that will be placed in the Objects
Library within Bryce.
The individual models created in this project will be used as building blocks
for the city, giving you the chance to create different structures for future use.
Throughout the tutorial, you will be given names for objects and groups. You
do not have to use these names, you can make up your own, however it is
recommended that you name everything so that they are easier to find later.
Also, remember that the images will show resizing using the scaling tool or
object handles, with a screen capture of the Object Attributes panel nearby. You
can either modify the objects using the numbers in the Attributes panel or use
the scaling tools to get as close as possible to the image, then use the
Attributes panel to finalize the size and placement. Since you won't always have
the exact numbers to go by, using the scaling tools is a good way to learn how
to resize and place objects while building your own models.
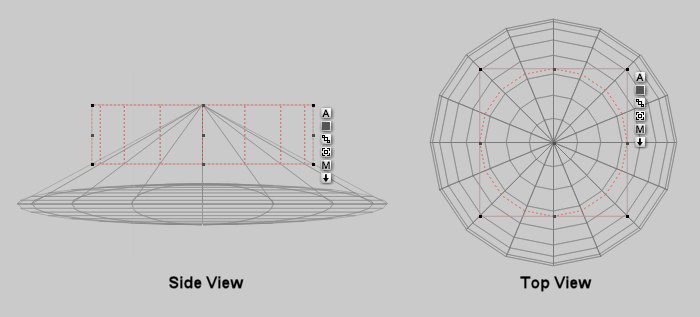
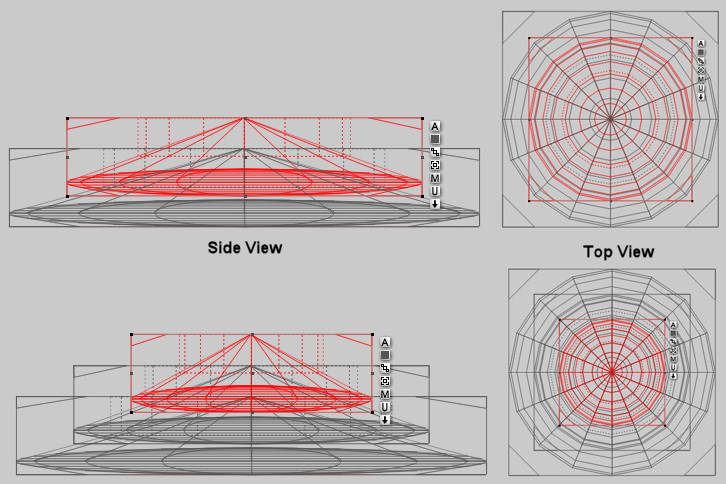
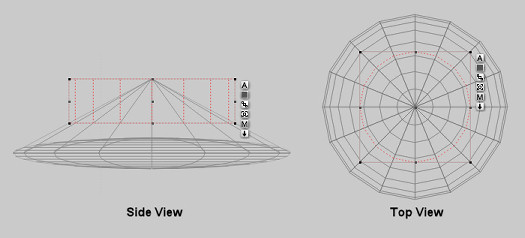
So, to start off the modeling of the main feature, we will be creating the
base. This consists of three spheres, three cones, and three cylinders. The
process will involve alignment, duplication, and grouping. Boolean
operations will also be used. In the example, the neutral objects appear as
orange, the positive objects as pink, and the negative ones as blue.

(click on image for a larger version)
Open a new file in Bryce and click Ctrl+Alt+N to access the document
set-up and choose Max Recommended.
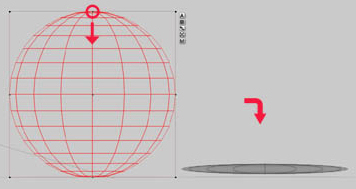
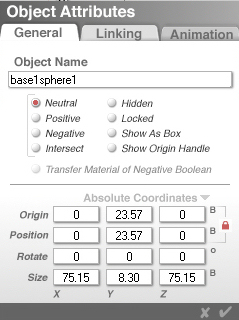
Create a Sphere, resize it down through the Y-axis so you have an ellipse
and rename the sphere so it's easy to find later:
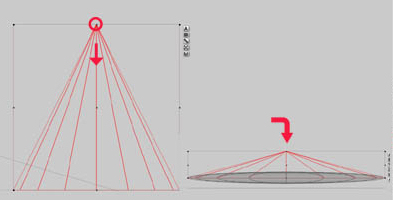
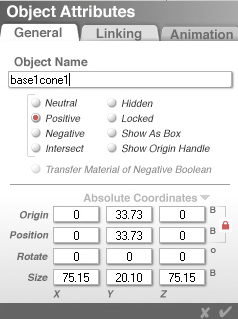
Now create a cone and reduce the height in the same way and align it
with the sphere so the base of the cone sits in the centre of the sphere.
The X and Z-size of the cone should match the sphere. Set the cone to positive
as we will be cutting the top of the cone off.
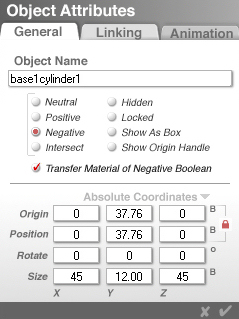
Create a cylinder, reduce the scale and increase the width as shown below.
Set it to negative as it will be used to cut the top off the cone.
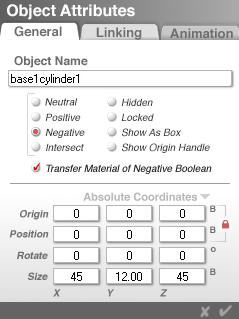
Align the cylinder so that the top edge is level with the pinnacle of the
cone. It will probably be easier to place the cylinder manually, then make final
adjustments to line it up with the cone in the Object Attributes.
Now, select all three objects (sphere, cone, and cylinder) and group them together by clicking on the
 button next to the selected objects,
then enter the Object Attributes and rename the group: button next to the selected objects,
then enter the Object Attributes and rename the group:
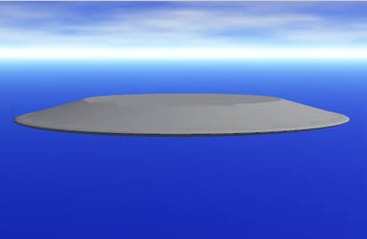
A quick render should show you have something like this:
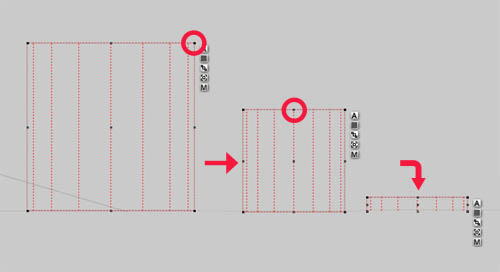
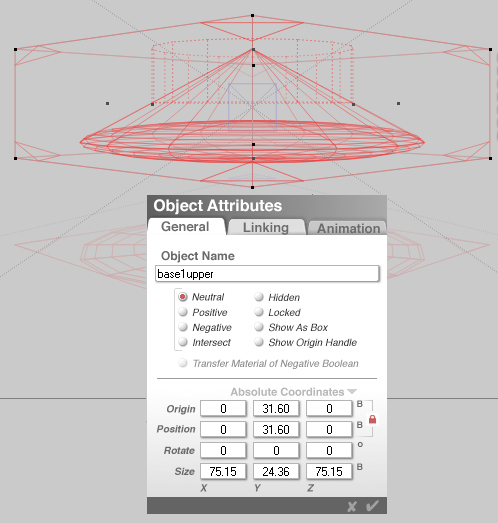
Duplicate the group by pressing Ctrl-D. Click on the
 button next to the new group and
resize it along the X and Z-axes to 111 and then rename it "base1middle". Duplicate
the second group and resize the new group along the X and Z-axes to 147 and
rename it "base1lower". Now, move the groups so that the two smaller groups are
above the largest one, with the smallest at the top. The Y-axes settings should
be about 31.5 for the upper group, 21.80 for the middle group, and 12.18 for the
lower group. Again, place the objects manually as close as you can then make
finer adjustments in the Object Attributes. button next to the new group and
resize it along the X and Z-axes to 111 and then rename it "base1middle". Duplicate
the second group and resize the new group along the X and Z-axes to 147 and
rename it "base1lower". Now, move the groups so that the two smaller groups are
above the largest one, with the smallest at the top. The Y-axes settings should
be about 31.5 for the upper group, 21.80 for the middle group, and 12.18 for the
lower group. Again, place the objects manually as close as you can then make
finer adjustments in the Object Attributes.

(click on image for a larger view)
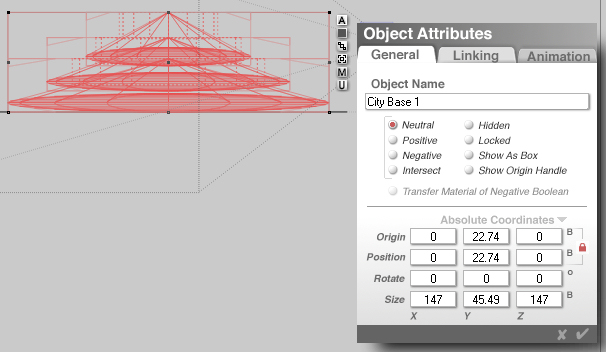
Select all three groups and group them together. Click on the
button next to the new group and
name it something like "base" or "City Base 1":
Apply the Polished Pewter material from the Master Series Cloud City Material
Presets sub-library. Save the model to your Object Presets Library for later use. If you copied
the included Presets folder into the Bryce 5 main folder, select the Master
Series library and save the base to the Cloud City sub-library.
Step 2 The Center Dome |